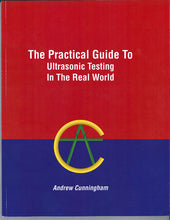
The author, Andrew Cunningham, is a Senior Ultrasonic Technician with over 30 years experience in ultrasonic non-destructive testing. He has worked across every continent in the northern hemisphere on many major projects and have been employed by some of the world’s largest companies. During his career, Mr. Cunningham has noticed that many technicians are able to repeat what they have been taught but it is evident they have never really understood what they have been taught. The standard ultrasonic textbooks suffer a similar problem in being over complicated and full of theoretical information that is never used in the field. At the same time, he also paid attention to whether the data he was seeing corresponded with everything he was taught during his training in the UK. He was surprised to find that the ultrasonic effects that he saw every day were often never mentioned, and were even contradicted by the accepted texts and tutorials. He has written ‘The Practical Guide To Ultrasonic Testing In The Real World’, ISBN 978-0-9809893-0-4, a workplace skills manual for technicians and QA/QC Departments, to explain the theory in simple terms together with the use of diagrams, to show some ‘tricks’ and original alternative techniques that he believes, improve accuracy and results while keeping the job simple and efficient.
It is not a pretentious regurgitation of lots of mathematical formulas and complicated scientific explanation, but instead it aims to be clear, concise and simple in its explanation without losing its integrity. It shows various techniques and exercises that Andrew Cunningham developed to help recognize, size and position defects with greater accuracy thus reducing false calls and the wasting of time and consumables.
Parts of this book may sound controversial, but these techniques have been the mainstay of the daily work and have been backed up by many years of experience and experiment. Andrew Cunningham's intent is for this book to be used by qualified technicians to improve their skills, the quality of their results and their efficiency in the daily challenges to be met by the NDT industry. It is essential reading for all technicians prior to learning automated and computerized techniques such as phased array and TOFD.
Due to some of its controversial content, I must caution that it is not recommended for exam preparation. Andrew has endeavoured to make this manual clear, concise and user-friendly. I hope you find this book useful and that it allows you to challenge the more traditional and orthodox techniques we were all taught to enable us to qualify.
Table of Contents
| Foreword | ----- | 5 |
| Sound | ----- | 6 |
| Compression waves | ----- | 6 |
| Shear waves | ----- | 9 |
| Lobes, Cones, and Other Myths | ----- | 10 |
| Compression and Shear Waves Travel Together | ----- | 12 |
| Quick Calculations of the wavelength | ----- | 15 |
| Amplitude and Decibels | ----- | 16 |
| The Screen Display | ----- | 17 |
| The Ultrasonic Flaw Detector | ----- | 18 |
| The Straight Beam Probe | ----- | 22 |
| The Dead Zone | ----- | 23 |
| Near zone / Far zone | ----- | 27 |
| Measuring the initial pulse I.P. | ----- | 32 |
| Thickness Measurements | ----- | 34 |
| Checking the probe prior to measuring | ----- | 35 |
| Measuring with a 0° probe | ----- | 36 |
| Calibrating for different alloy | ----- | 37 |
| Know your probes | ----- | 38 |
| Using the IIW V1 block | ----- | 41 |
| Calibrating to shear wave | ----- | 42 |
| Scanning with a 0° probe | ----- | 44 |
| Sizing holes in machined parts | ----- | 45 |
| Grid Scan | ----- | 47 |
| Scanning for Internal pits | ----- | 49 |
| Scanning for pits on a curved surface (vessels and piping) | ----- | 50 |
| Scanning for volumetric integrity | ----- | 51 |
| Shear wave scan | ----- | 52 |
| Distance-Amplitude Correction (DAC) Curve | ----- | 54 |
| How to construct a DAC curve | ----- | 55 |
| How to use the DAC Curve | ----- | 56 |
| Making the transfer loss DAC | ----- | 56 |
| Setting sensitivity | ----- | 57 |
| Plotting system | ----- | 58 |
| Locating the reflector with simple math | ----- | 59 |
| Finding the Position in front of the probe | ----- | 60 |
| Finding Depth as a percentage | ----- | 62 |
| Sizing for length with Max Amp | ----- | 67 |
| Sizing for length with 6db drop | ----- | 69 |
| Size for length with 20dB drop | ----- | 71 |
| Total drop | ----- | 72 |
| Combination of all sizing techniques | ----- | 73 |
| Combining all of the above methods | ----- | 75 |
| Finding the true angle | ----- | 76 |
| Maximum Amplitude Technique | ----- | 77 |
| Common Weld Flaws | ----- | 81 |
| 6dB drop | ----- | 84 |
| Probe manipulation | ----- | 90 |
| Echo interpretation | ----- | 91 |
| Cracks | ----- | 92 |
| Lack of Side Wall Fusion and/or Lack of Root Fusion | ----- | 93 |
| Lack of Root Fusion | ----- | 94 |
| Lack of Interpass Fusion | ----- | 95 |
| Slag Inclusion | ----- | 96 |
| Isolated Gas Pore | ----- | 98 |
| Porosy Cluster | ----- | 99 |
| Concave Root ("Suck Up") | ----- | 100 |
| Bad Pick-Up ("Stop-Start") | ----- | 101 |
| Misalignment (High/Low) and/or Mismatch | ----- | 102 |
| Flanges | ----- | 103 |
| T K Y Joints | ----- | 104 |
| End-scans of Welds | ----- | 104 |
| Nozzle To Shell Welds and Node Plates | ----- | 105 |
| Sizing "invisible" flaws | ----- | 107 |
| Nozzle Testing | ----- | 110 |


